.png)
Vintage Hole Look without Drilling!
- homebyyvonne
- May 26
- 2 min read

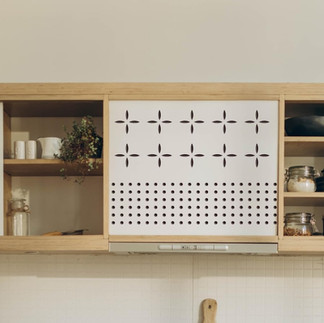
Add vintage charm with the stenciled "vent cut-out" look!
What are vent cut-outs in cabinets?
They existed in the 1800s-1900s to keep food fresher and safer. After HVAC systems were widespread, it soon faded and weren't necessary. It revived as a trend now in modern homes for mudrooms and kitchens.
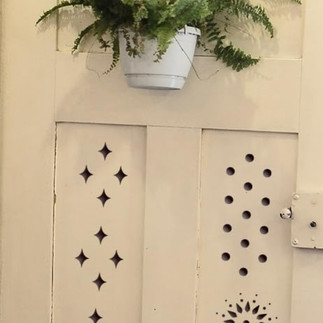
Which one would you pick?

Think geometric, symmetrical and repeated patterns!
A. Four diamonds within a diamond shape layout. B. Combination of lattice above and arrowed heads centered with lines and a dot on the cabinet door. C. Just lattice above. D. 4 elongated hexagons with a small circle in the middle to a make a floral look.


Quick Checklist
3 Options:
Individual Materials:
Removable matte vinyl, transfer tape, scraper, level, measuring tape, pencil.
All in One Kit:
Stencil Kit (not as renter friendly):
Vent Holes Painting Stencil as shown in image below. See how realistic it looks?!


How To
Plan: Decide vent field size, hole size, and mark spacing.
Apply: Clean, align with pencil grid, hinge with painter’s tape, smooth out, peel transfer tape.
Refine: Check spacing and repeat on all doors.
Optional Use for Design:
Design software - Cricut Design Space / Silhouette Studio / Canva (for layout planning)
Choosing a color:
For subtle appearance use a darker color match or dark gray.
For realistic appearance make sure it is a matte vinyl or color (not shiny).
For Vinyl Removal - Safe & Renter Friendly:
Warm the vinyl slightly with a hair dryer on low.
Peel slowly at a low angle.
Remove residue (if any) with a gentle adhesive remover safe for painted surfaces.
No drilled holes, no patching, no landlord drama.
And enjoy it! Share it on your social media page and comment in mine so, we can see it! :))
Happy at-home designing!
-HomebyYvonne
IG & FB


Comments